
Support
Custom fields
Last update: 07-03-2025Custom fields allow you to store extra information about your contacts and customize your communications.
You can choose what extra information you want to keep of your contacts by editing the configuration of the list to which they belong.
Create new custom fields
- Go to the option "Custom Fields" available in the menu "Contacts"
- Click on the button Add
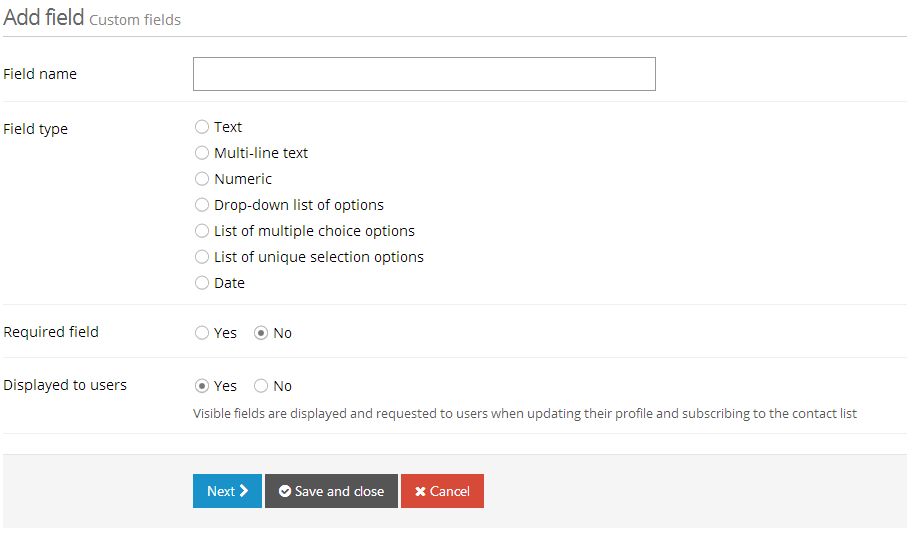
- Fill in the information requested
- Select the field type correctly. As a general rule, choose the option text to input free data and dropdown lists when it is necessary to restrict the possible values of the field.
- Pay special attention when indicating
- whether it should be compulsory or not to fill in the field
- whether it should be visible to users or not when updating their profile or unsubscribing from your list, or if it should be only an informational field for internal use.
Use custom fields in lists
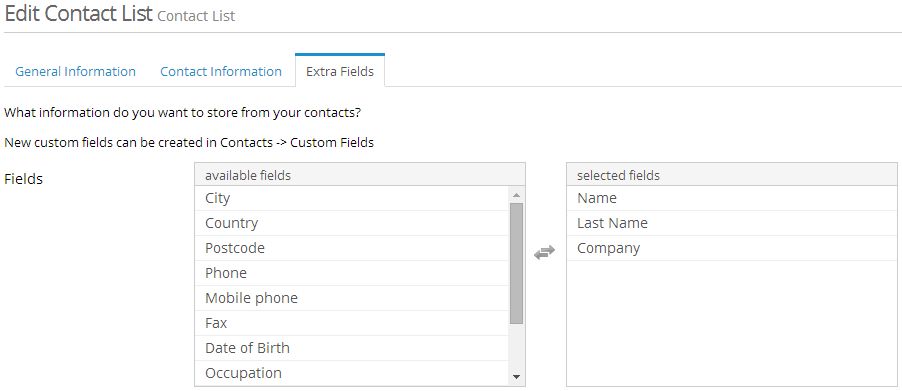
Custom fields can be specified either when creating or editing a list later. In the tab Extra Fields, you are able to view the available custom fields, and those already assigned to a specific list.
Once you assigned the custom fields of your choice, click the button Save. Now, when accessing a contact record, you are able to see the new custom fields you added.
Use custom fields in campaigns
The information stored of your contacts enables you to customize your campaigns and stay close to your subscribers. Learn how to use custom fields in campaigns.
Use custom fields in subscription forms
When creating a form, you can also make custom fields display. To make custom fields appearing in the form, first you must indicate that you want them to be part of a contact list that you have already created.
To do that you have to follow these steps:
- Go to "Contacts" - "Manage Lists"
- Once you are in this section find the list where you want to add the custom fields that you have already created previously and press "Edit".
- Clic on the tab "Extra fields"
- Choose custom fields (marked with an asterisk) from the list "Available fields" that you want to transfer to your list "Selected fields".
- Press "Save"
From now on you will be able to save, in addition to your subscriber's email address, information in the 'custom fields' you have configured. Also you could generate a subscription form where this data will be requested from the section "Resources" - "Forms".
Schedule a free demo
Our experts will advise you on the best Email Marketing solution for your business.
REQUEST DEMO